Free printable handout · PDF
Tech Neck Exercises: Free Printable PDF Handout
Talk to your doctor first. General education, not medical advice.This content is general education, not medical advice, diagnosis or treatment. Get approval from your physician or another qualified healthcare provider before starting any exercise program, especially if you have a medical condition, a recent injury or surgery, are pregnant, or take medication. Stop and seek medical advice if an exercise causes pain, dizziness, chest discomfort or shortness of breath. You choose to exercise at your own risk. Read the full medical disclaimer.
A two-page home exercise sheet: 14 exercises in 4 phases. Every exercise has a video on this page. Print it, save it to your phone, or share it. No signup needed.
¿Prefiere español? Vea esta hoja en español →
- Acupressure for Neck Pain
- Neck Tension Release (Gentle Yoga)
- Levator Scapulae Stretch
- Trapezius Release
- Chin Tucks for Cervical Alignment
- Cervical Rotation Mobility
- Doorway Pectoral Stretch
- Deep Neck Flexor Exercise (Head Nod)
- Scapular Squeezes & Posture Correction
- Upper Body Strength for Seniors
- Shoulder & Upper Back Flexibility
- Band Pull-Apart
- Acupressure for Stress & Headaches
- Yoga: Strength & Balance
- Sets, reps and holds explained
- Pain guide with room for your limit
- Clinician notes and a 6-week tracker
What you’ll need Paid links
Most of this handout needs only a chair, a wall and some floor space. Some exercises use these items. Household swaps are listed where they work.
- Exercise mat · Non-slip, about 6 mm (1/4 in) thick, for floor exercises. A rug or folded blanket works.
- Resistance bands · A set with several levels; start with the lightest. Some clinics give patients a starter band.
- Light dumbbells · Start light and build up slowly. Water bottles or food cans work to start.
Which exercises use each item, and what to look for: equipment guide.
Links go to Amazon search results, so you choose the product and price. We don’t recommend specific brands. As an Amazon Associate we earn from qualifying purchases, at no extra cost to you. How we make money
Watch each exercise
Start with Phase 1. Move to the next phase when the current exercises feel comfortable. Tap any exercise for step-by-step instructions.
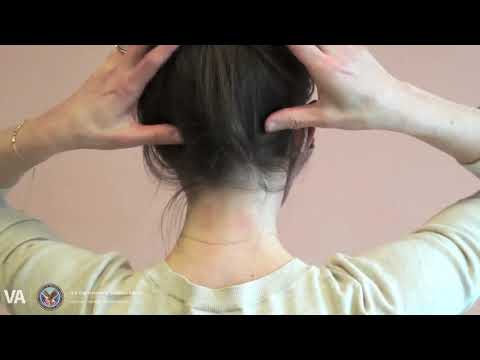
Phase 1 starts here: Acupressure for Neck Pain. Video embedded from its original publisher.
Phase 1 — Acute Relief
- Acupressure for Neck PainUsual start: 30–60 sec per point, 2–3 times a dayVideo + steps →
- Neck Tension Release (Gentle Yoga)Usual start: Follow along, once a day or as neededVideo + steps →
- Levator Scapulae StretchUsual start: 3 holds of 30 sec each side, once or twice a dayVideo + steps →
- Trapezius ReleaseUsual start: 3 holds of 30 sec each sideVideo + steps →
Phase 2 — Postural Retraining
- Chin Tucks for Cervical AlignmentUsual start: 3 × 10, holding each for 5 sec; or 5 tucks every hour at a deskVideo + steps →
- Cervical Rotation MobilityUsual start: 2 × 10 each wayVideo + steps →
- Doorway Pectoral StretchUsual start: 3 holds of 30 secVideo + steps →
- Deep Neck Flexor Exercise (Head Nod)Usual start: 10 × 10 sec holdsVideo + steps →
Phase 3 — Scapular Strengthening
- Scapular Squeezes & Posture CorrectionUsual start: 3 × 12, holding each squeeze for 3–5 secVideo + steps →
- Upper Body Strength for SeniorsUsual start: Follow along, 2–3 days a weekVideo + steps →
- Shoulder & Upper Back FlexibilityUsual start: Follow along, most daysVideo + steps →
- Band Pull-ApartUsual start: 2–3 × 12–15Video + steps →
Phase 4 — Maintenance
- Acupressure for Stress & HeadachesUsual start: 30–60 sec per point, as neededVideo + steps →
- Yoga: Strength & BalanceUsual start: Follow along, 2–3 times a weekVideo + steps →
Day-by-day plan
4-week neck posture reset →
Short daily sessions: release, strengthen, then a routine to keep.
How much and how often
If a physical therapist, chiropractor or doctor gave you this sheet, follow the amounts they wrote in the boxes. If a box is blank, the usual start under each exercise above is a typical starting amount for most people, not a prescription for you. Start at the low end and build up slowly.
- Rep: one movement. Set: a group of reps in a row, with 30 to 60 seconds of rest between sets. 2 × 10 means 2 sets of 10 reps; 3 × 30 sec means 3 holds of 30 seconds.
- Stretches: hold 20 to 30 seconds, 2 to 3 times, most days. A gentle pull, never sharp pain.
- Strength: 1 to 3 sets of 8 to 15 slow reps, 2 to 3 days a week with a rest day between. The last 2 or 3 reps should feel like work while you keep good form.
- Balance: a few minutes most days, next to a counter or sturdy chair.
- Follow-along videos: 2 to 3 times a week to start. Skip any part that hurts and do the rest.
How much discomfort is OK? Some discomfort is common. On a 0 to 10 scale, pain up to about 3 to 5 that settles by the next morning is often acceptable, or use the limit your clinician gives you. If pain goes above that, is worse the next morning, or builds from week to week, do less next time.
When to do more: after a full week at your current amount stays inside your pain limit, add a little, one thing at a time: a few more reps, then another set, then the next phase. If you miss a few days, restart a step lower.
Stop and contact your clinician if you have sharp or severe pain, pain that keeps getting worse, new numbness, tingling or weakness, new swelling, dizziness or a fall. For chest pain or trouble breathing, stop and call 911.
Page 2 of the PDF has this guide, a box for your pain limit, notes from your clinician and a 6-week tick tracker.
For clinicians
You’re welcome to print this sheet and hand it to patients at no cost. Page 1 has a tick box to choose which exercises to do and blank boxes for sets, reps or hold, times a day and days a week for each one. Page 2 explains sets, reps and how often in plain language, with space for the patient’s pain limit, your notes and a next check-in date. Prefer to send it digitally with your own doses? Build a program in the free clinician portal. See also resources for providers.
More free handouts
Considering a nerve block for headaches? (UK and Ireland)
Whether the NHS, private health insurance or the HSE usually pays, what self-pay costs, and what to ask first.
- Occipital nerve block for headache: NHS, insurance and cost
- Private occipital nerve block prices
- Facet joint injection: NHS, insurance and cost
- All procedures: will it be covered?
In the US? How Medicare and insurance cover pain procedures
In Canada or Australia? Coverage in Canada · Coverage in Australia
Educational use only. Not a substitute for medical advice. Videos are embedded from their original publishers and remain the property of those publishers.